SketchUp to Blender: what to export, and what to fix after import
The old answer was "export Collada". Blender 5.0 removed Collada import, so that answer now depends on your Blender version. Here's what works in each, the SketchUp export settings, and the fixes most imported models need before they render well.
Which format for which Blender
| Blender | Use | Notes |
|---|---|---|
| 4.2 to 4.4 | OBJ | Collada still imports but is deprecated. The FBX importer is the older Python one, which can't read ASCII FBX, and users report SketchUp writes ASCII FBX. |
| 4.5 LTS | OBJ, or FBX via FBX (.fbx) (experimental) | The new C++ importer reads ASCII FBX and is much faster. Drag and drop still uses the old one. Collada shows as Legacy, and 4.5 is the last version with it. |
| 5.0 and later | OBJ or FBX | The new FBX importer is the default. Collada is gone. To open an old .dae, import it in 4.5 and save a .blend. |
OBJ is the safe pick everywhere. It carries geometry, UVs and basic materials, which is all a render needs.
Export from SketchUp
SketchUp's help pages list OBJ and FBX export under SketchUp Pro: File > Export > 3D Model, then pick the type and open Options.
- Export Texture Maps: on, if you used textures.
- Export Two-Sided Faces: off. It writes every face twice, front and back, which gives you overlapping faces in Blender.
- Export Edges (OBJ): off. Blender doesn't need SketchUp's lines.
- Triangulate All Faces: off, so faces stay as quads and n-gons where possible.
- Units: Meters, to match Blender's default scene units.
- Swap YZ Coordinates (Y Is Up): tick it for OBJ. SketchUp exports Z-up by default, while Blender's OBJ importer expects Y-up, so an untouched export arrives lying on its side. The alternative is to set Forward Axis Y and Up Axis Z in Blender's OBJ import options.
Import into Blender
- File > Import > Wavefront (.obj), or FBX as in the table above.
- Check the size. Select an object, press N and read Dimensions. A 10 m house showing 0.25 m or 393 m means a units mix-up. Scale it, then apply with Ctrl A > Rotation & Scale so modifiers and textures behave. Applying rotation also catches a model imported on its side, whose Dimensions would otherwise still look right.
Cleanup that most models need
- Flipped faces. SketchUp has a front and a back to every face, and models often have some reversed. Turn on Overlays > Face Orientation: blue is front, red is back. In Edit Mode, select all and press Shift N to recalculate normals outside.
- Duplicate vertices. In Edit Mode, select all, then Mesh > Clean Up > Merge by Distance (M > By Distance).
- Faces come in as triangles. Alt J (Tris to Quads) joins most of them back, which makes the model easier to edit.
- Textures don't show. SketchUp only exports UV maps for faces that had a texture. Faces painted with a plain colour come in without UVs, so a new image texture renders flat. Select them and run UV > Smart UV Project (U in Edit Mode), or Cube Projection for boxy walls.
- Materials. SketchUp colours arrive as the Principled BSDF base colour. That's a fine start, but swap the glass for real glass (see window glass in Blender) and add roughness to everything else.
Then set up the shot
In Blender, start from a level camera with lens shift, as in two-point perspective in Blender, and light it with the interior lighting steps or a dusk setup.
Or render it in one click
For a quick concept image of an imported model, you can skip the UV and material cleanup. Partilock, the Blender add-on we build (macOS), sends the camera view to an AI image model and returns the image in about a minute. A real 2K render, unretouched:
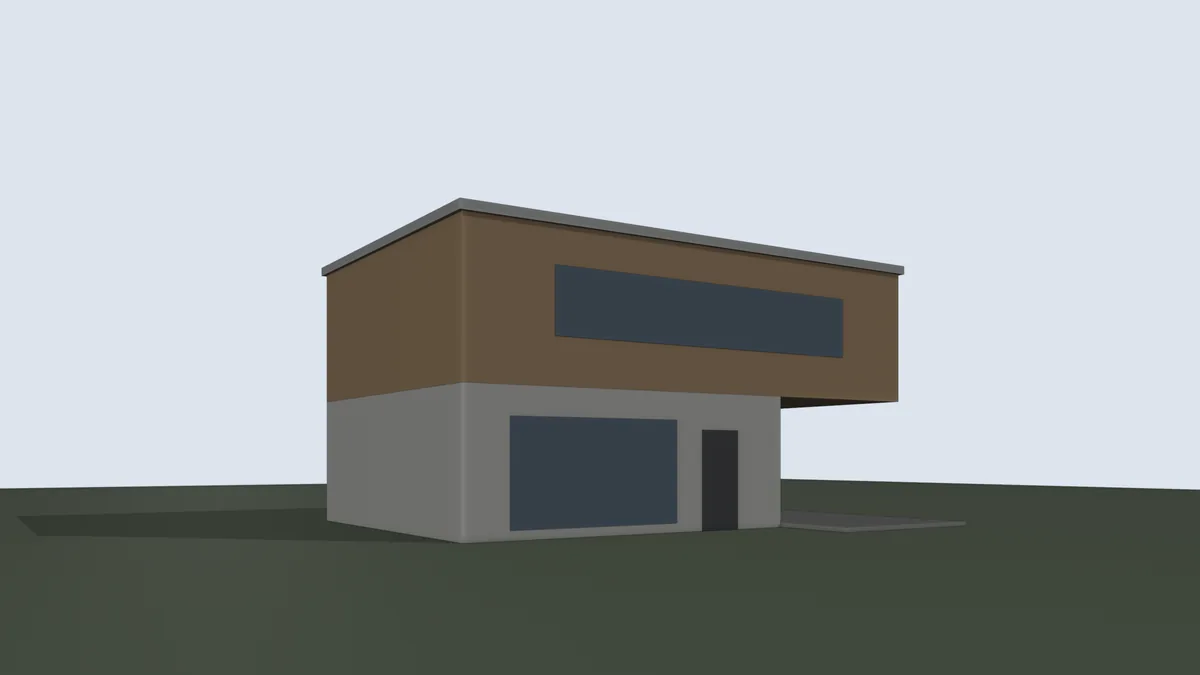
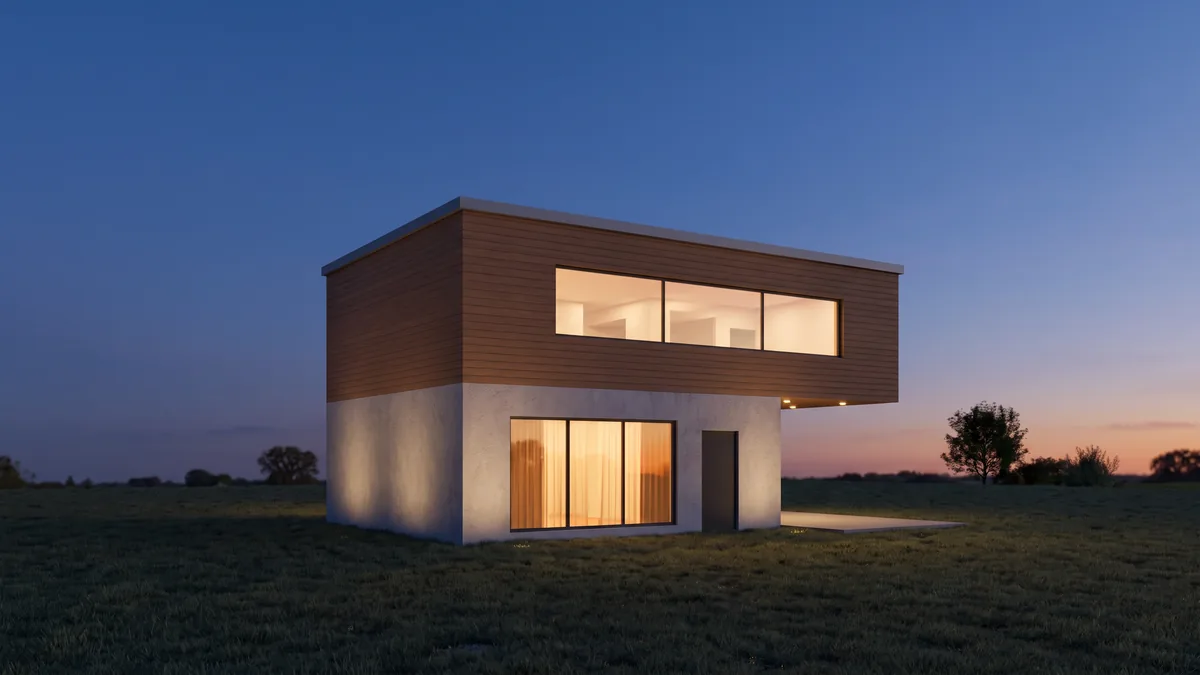
The model's colours were the brief: brown came back as timber, grey as concrete. The render added downlights under the cantilever, mullions and curtains, which aren't in the model. The cleanup above still matters for a full Cycles render.
It's an image, not geometry, and it can add small fittings, so check it before a client sees it. 2 free renders to try (1K, watermarked), then 2K from $9 for 18. Install guide, pricing.