Revit to Blender: which export to use and how to clean it up
Revit has no Blender button, but it exports formats Blender reads. Geometry is the easy part. Every source we checked reports that textures don't survive the trip, and materials arrive basic at best, so plan to redo materials in Blender. Here's which route to pick and what to fix after import.
The four routes
| Route | In Revit | In Blender | Good for |
|---|---|---|---|
| FBX | File > Export > FBX, from an open 3D view | File > Import > FBX | A quick look. Users report dense meshes and basic materials only |
| OBJ | File > Export > CAD Formats > OBJ (Revit 2022 and later), from a 3D view | File > Import > Wavefront (.obj) | Visualisation. You choose mesh resolution and units |
| IFC | File > Export > IFC | The free Bonsai add-on | Keeping element types and properties, or round-trips |
| Speckle | Speckle connector (Windows) | Speckle connector (Windows, macOS) | Live updates while the design changes |
1. Prepare a 3D view in Revit first
Both FBX and OBJ export from the active 3D view. Autodesk's help says the FBX option is greyed out until a 3D view is open, and that OBJ geometry follows the view's visibility and graphics settings. So make a dedicated export view:
- Hide what you won't render: annotation, furniture you'll replace, MEP, site context you'll rebuild.
- Use a section box to cut the export to the part of the building in shot.
- Fewer elements in the view means a lighter file and an easier cleanup.
2. OBJ: the simplest route
- In the 3D view, File > Export > CAD Formats > OBJ.
- Set Resolution. Medium is the default. Coarse keeps curved elements lighter, and Fine is for close-ups of curved work.
- Set Units to metres (it defaults to the model's length units). Blender works in metres, so this avoids scaling later.
- In Blender, File > Import > Wavefront (.obj).
Autodesk's help lists no texture or material options for the OBJ export, so don't count on textures. We haven't tested what the material file carries.
3. FBX
FBX is the older, familiar route, and it works. Autodesk's FBX help is written for 3ds Max, where Revit's materials are meant to be rebuilt. Users on the OSArch forum report that the built-in exporter doesn't use FBX's texture support and makes "unnecessarily dense" meshes. Blender 5.0 made its newer, much faster FBX importer the default and added a Material Name Collision option for files with duplicate material names. On 4.2 to 4.5 the default menu entry is the older Python importer. 4.5 also lists the new one as FBX (experimental).
4. IFC with Bonsai
Bonsai (formerly BlenderBIM) is a free add-on that opens IFC files natively, with element classes and properties. Install it from Edit > Preferences > Get Extensions. Recent Bonsai releases list Blender 5.1 or newer, and older ones 4.2, so check the version list against your Blender.
One known trap: Revit IFC exports can place the model thousands of kilometres from the origin when shared or survey coordinates are set. Floating-point precision suffers that far out, and you'll see jittery edges and shadows. Bonsai can set a false origin on import, or you can set the IFC export's coordinate base in Revit to the Project Base Point.
5. Speckle
Speckle sends the model from a Revit connector (Revit 2023 to 2027, Windows) to a Blender connector (Blender 4.2 to 5.1, Windows and macOS), and you can re-send as the design changes. It carries render material colours but not image textures. There's a free plan with limits on projects and history.
6. Clean up in Blender
- Scale: measure a door with the Measure tool. It should be about 2.1 m. If it isn't, re-export with metre units or scale on import, not afterwards on a hundred objects.
- Far from the origin: if everything sits far away, select all and move it so the building is near 0,0,0. The camera and lighting behave better.
- Object count: one object per Revit element is common. Joining by material (select all with the same material, Ctrl J) makes the scene easier to work with.
- Shading: if flat walls show dark streaks, check normals with Face Orientation in the overlays and recalculate them.
- Materials: replace the imported ones with your own. Same-named materials make this quick: change one and every wall using it updates.
- UVs: imported walls rarely have usable UVs. For brick, wood and tiles, use Box projection on the image texture, or add UVs with Smart UV Project.
ArchiCAD
ArchiCAD's help (version 28) describes File > Save as > FBX from the 3D window, with geometry, surfaces and textures in one file. Users report it was missing in some earlier versions, so check yours. The other formats and their traps are in ArchiCAD to Blender. For SketchUp, see SketchUp to Blender.
Or render it in one click
If the client wants a lit image of the Revit design before materials are rebuilt, Partilock, the Blender add-on we build (macOS), sends the camera view to an AI image model and returns the image in about a minute. A real 2K render, unretouched:
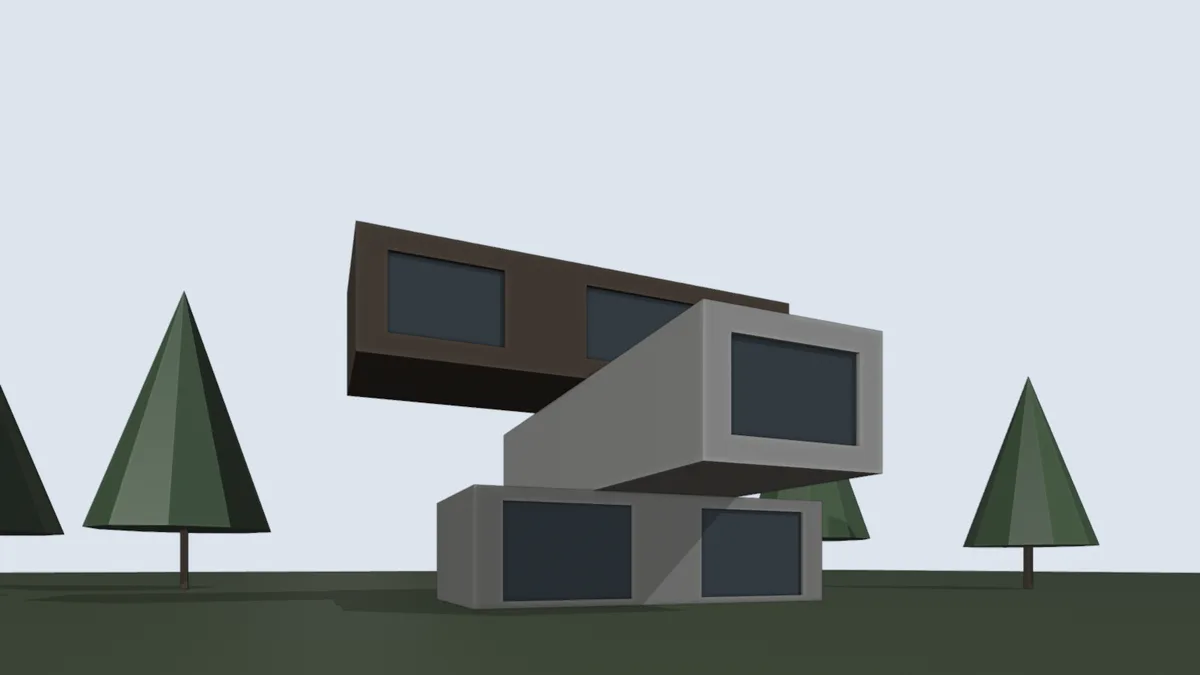
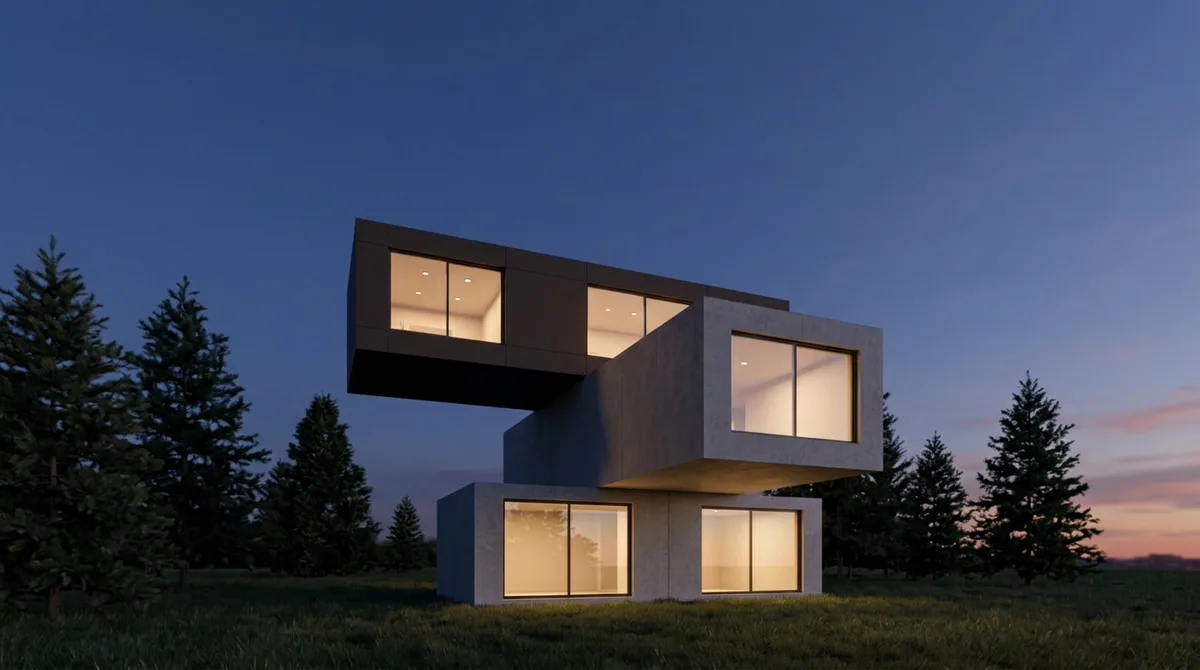
The model was three plain boxes with flat window panels and cone trees. The render made the dark box dark cladding panels, the others concrete, lit the rooms and added mullions to the glazing, which aren't in the model.
It's an image, not geometry, and it can add small fittings, so check it before a client sees it. 2 free renders to try (1K, watermarked), then 2K from $9 for 18. Install guide, pricing.