HDRI lighting in Blender for architecture
An HDRI is a 360° photo of a real sky that lights your scene. One file gives you sun, sky light and reflections that match each other, which is why most archviz exteriors start with one. The setup takes a minute. Placing the sun takes a little more thought.
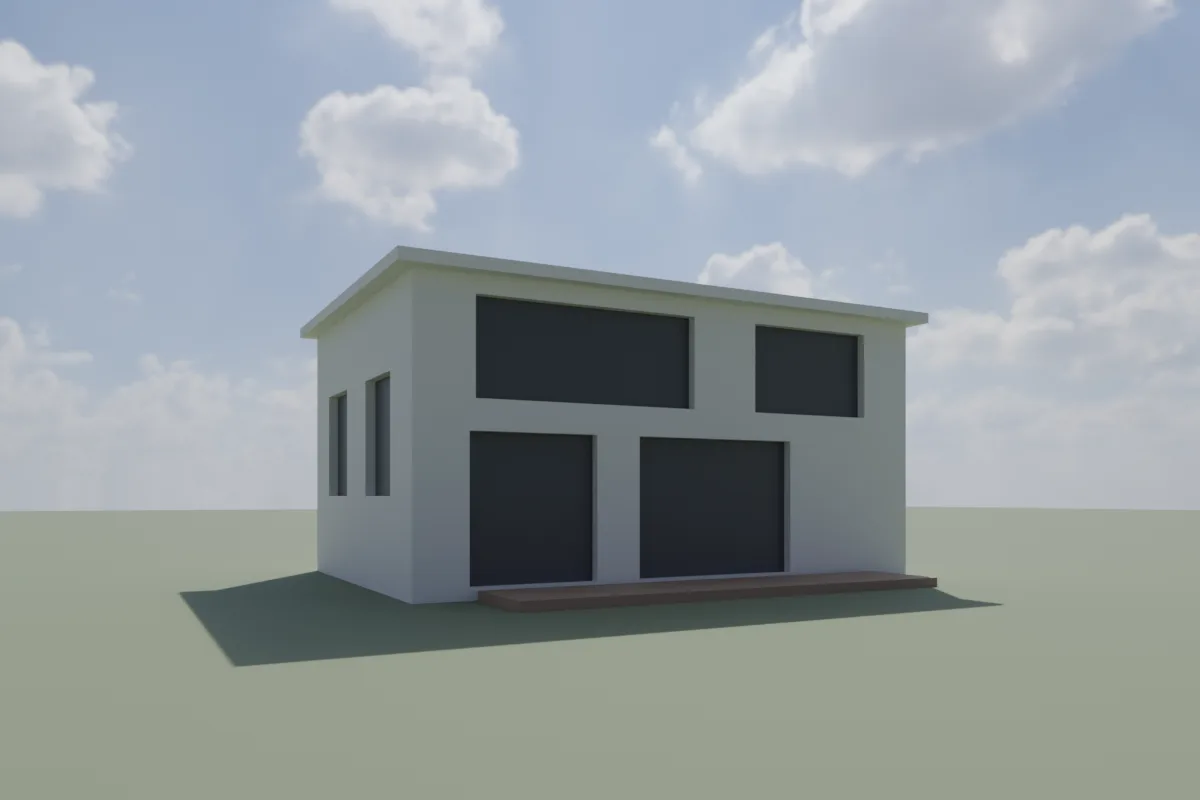
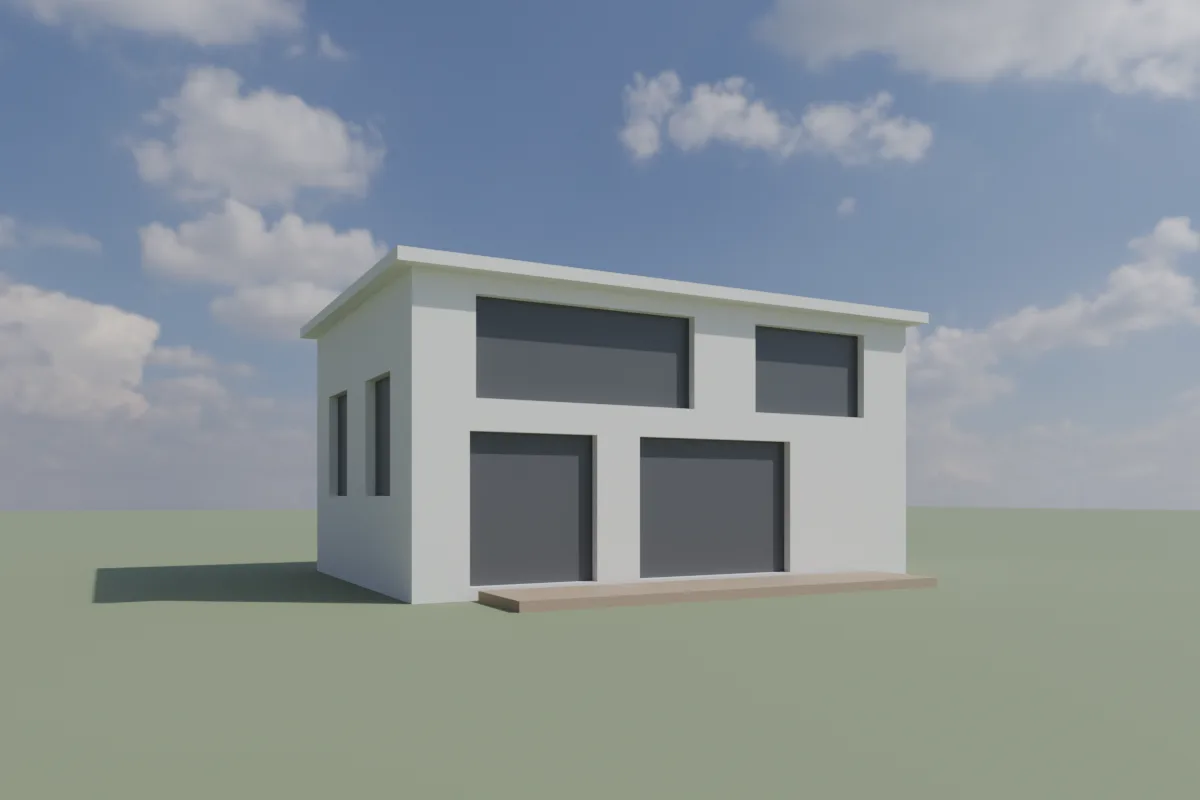
Our own test scene in Blender 4.5, Cycles, 128 samples with denoising, AgX, exposure 0. The only change between the two is the Z rotation of the HDRI. The HDRI is Poly Haven's free Kloofendal 48d Partly Cloudy (Pure Sky) at 2K.
1. Put the HDRI in the World
- Get an HDRI in .exr or .hdr format. Poly Haven has hundreds under CC0. For exteriors, "pure sky" versions have no ground in the image, so they don't fight with your own terrain. 2K is enough for lighting. Use 4K or more if the sky shows large behind the building.
- Open the World properties. Click the dot next to Color and pick Environment Texture, then Open and choose the file. You can also drag the file into the Shader Editor while it shows the World.
- Look at it in the viewport in Rendered shading. In Material Preview, Blender shows its own built-in studio HDRI until you tick Scene World in the shading popover. That's the usual reason "my HDRI isn't showing".
Blender also ships eight small HDRIs for the viewport (in its datafiles/studiolights/world folder). They're 1024 × 512 pixels, too soft for a visible background.
2. Rotate it to place the sun
An HDRI's sun is wherever the photographer found it, so you rotate the whole sky until the light falls where you want it.
- In the Shader Editor, switch the type to World.
- Add a Texture Coordinate node and a Mapping node. Connect Generated to the Mapping's Vector, and the Mapping's output to the Environment Texture's Vector. With the Node Wrangler add-on enabled (it ships with Blender, off by default), select the Environment Texture and press Ctrl T to add both.
- Change Rotation Z on the Mapping node and watch the shadows in Rendered view.
A building reads best with the sun at roughly 30 to 60° to the main facade, so it lights one face and leaves the other in shade. Sun straight behind the camera flattens the facade, and sun behind the building puts it in shade, as in the left image. Rotating on Z can't change the sun's height, and tilting the sky on X or Y tilts the horizon with it. For a low evening sun, pick an HDRI shot at that time of day.
3. Strength and exposure
- The Strength on the Background node scales the whole HDRI. 1 is as shot.
- To brighten or darken the image as a camera would, use Render Properties > Color Management > Exposure instead. It's in stops, and it keeps the sky and the building in the same balance.
- Keep View Transform on AgX (the default since 4.0) so a bright sky doesn't clip to flat white.
4. Hide or replace the background
Often you want the HDRI's light but your own background, or none.
- Transparent: Render Properties > Film > Transparent. The sky still lights the scene but renders as alpha. Save as PNG or EXR, not JPEG, and put your own sky behind it in an image editor or the compositor. Works in Cycles and EEVEE.
- A different visible background (Cycles): add a Light Path node and a second Background node with your colour or image, then a Mix Shader with Is Camera Ray as its factor. The camera sees the second background and everything else is lit by the HDRI. The Blender manual uses the same trick to show a high-res image while lighting with a low-res one. EEVEE supports the Light Path node in the World again from 5.1, so on 4.2 to 5.0 use Transparent instead.
If the background is invisible in your final render and you didn't ask for that, check that Film > Transparent is off.
5. Cycles and EEVEE differences
- Cycles samples bright spots in the HDRI directly when the World's Settings > Surface > Sampling is on Auto (the default). If a sharp sun still gives noisy shadows, switch Sampling to Manual and raise Map Resolution (default 1024). On Auto it's greyed out.
- EEVEE (4.2 and later) finds the sun in the HDRI and turns it into a sun light, so it casts real shadows. The control is World > Sun > Threshold. Set it to 0 to turn that off.
- For interiors, an HDRI lights the room through the windows like any sky. In Cycles add a portal in each window, as in interior lighting.
Or render it in one click
If you need a lit daytime image before you've picked an HDRI, Partilock, the Blender add-on we build (macOS), sends the camera view to an AI image model and returns the image in about a minute. A real 2K render, unretouched:
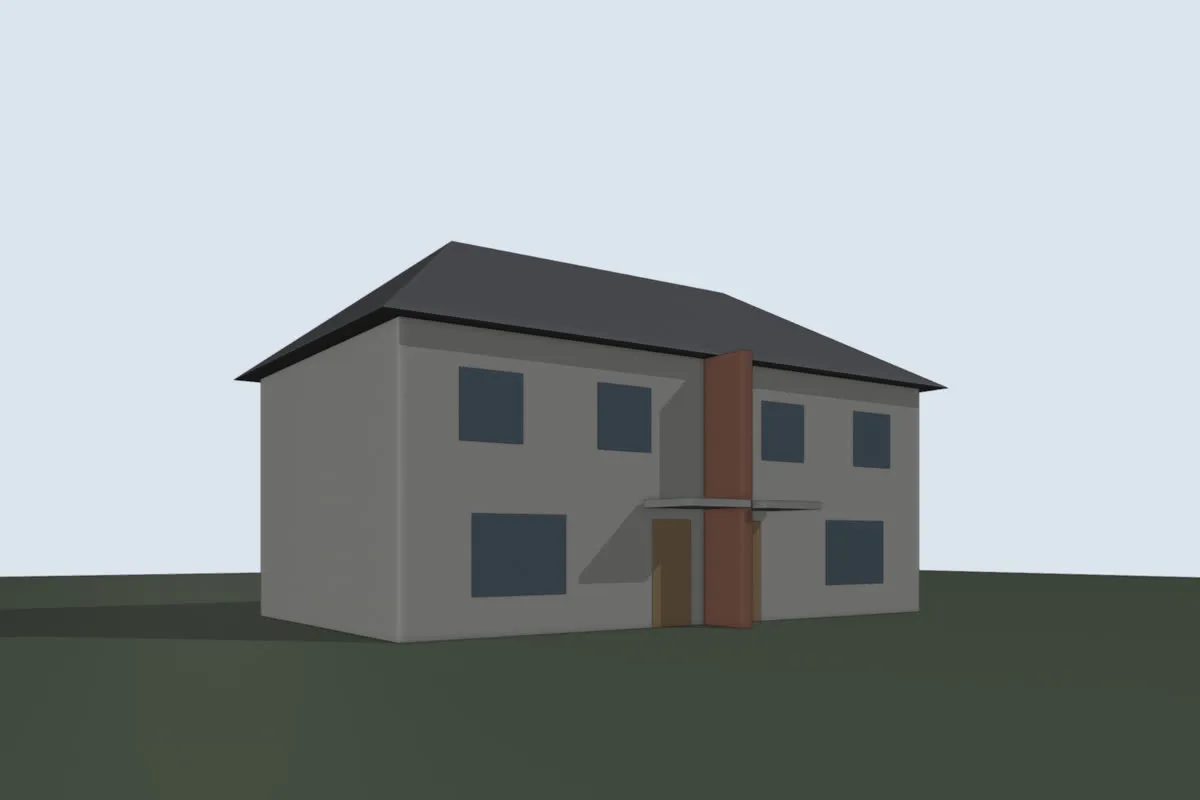
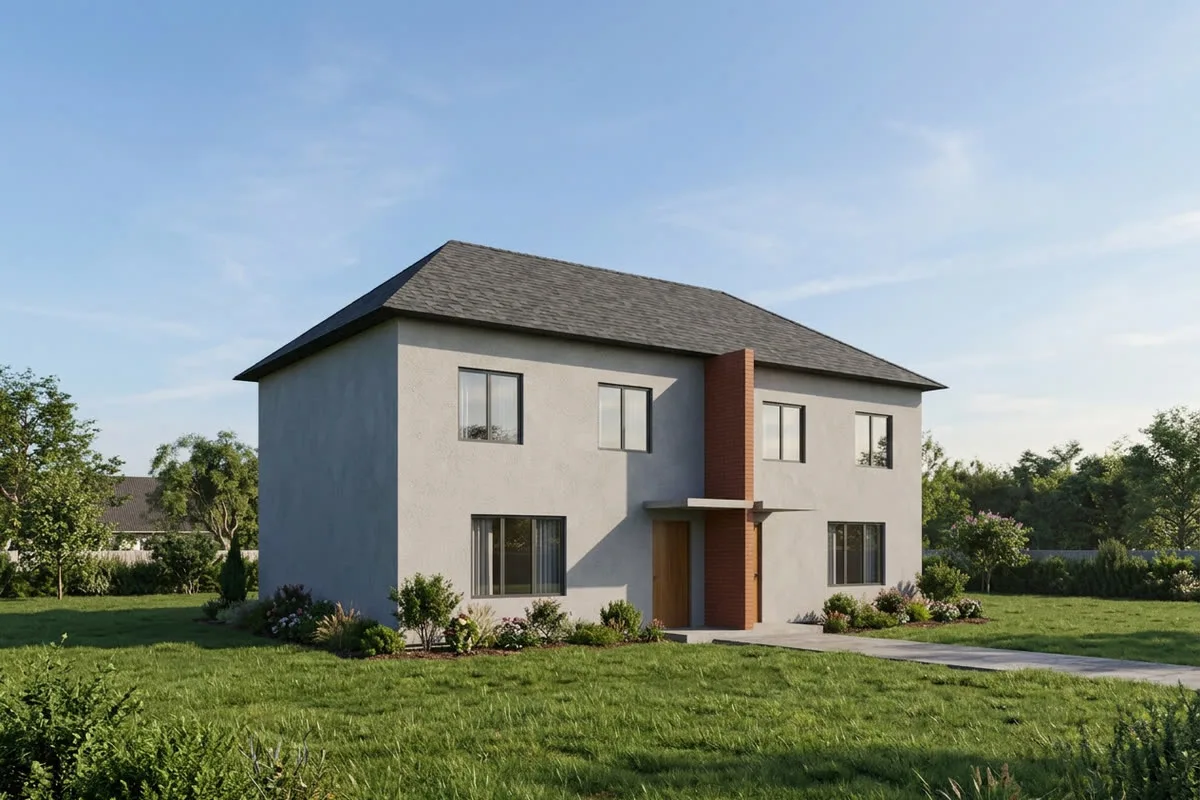
The window openings, the door and the entrance canopy are in the model. The render chose the sky, grass and planting, and added things that aren't modelled: window frames with glazing bars, brick on the entrance column, a path and a neighbouring house. That's the kind of detail to check.
It's an image, not geometry, and it can add small fittings, so check it before a client sees it. 2 free renders to try (1K, watermarked), then 2K from $9 for 18. Install guide, pricing.