Wood material in Blender, at real scale
A wood floor usually looks fake for one reason: the planks are the wrong size. A texture stretched once across the whole floor gives boards half a metre wide. Fix the scale, add the roughness and normal maps, and the same photo reads as a real floor.
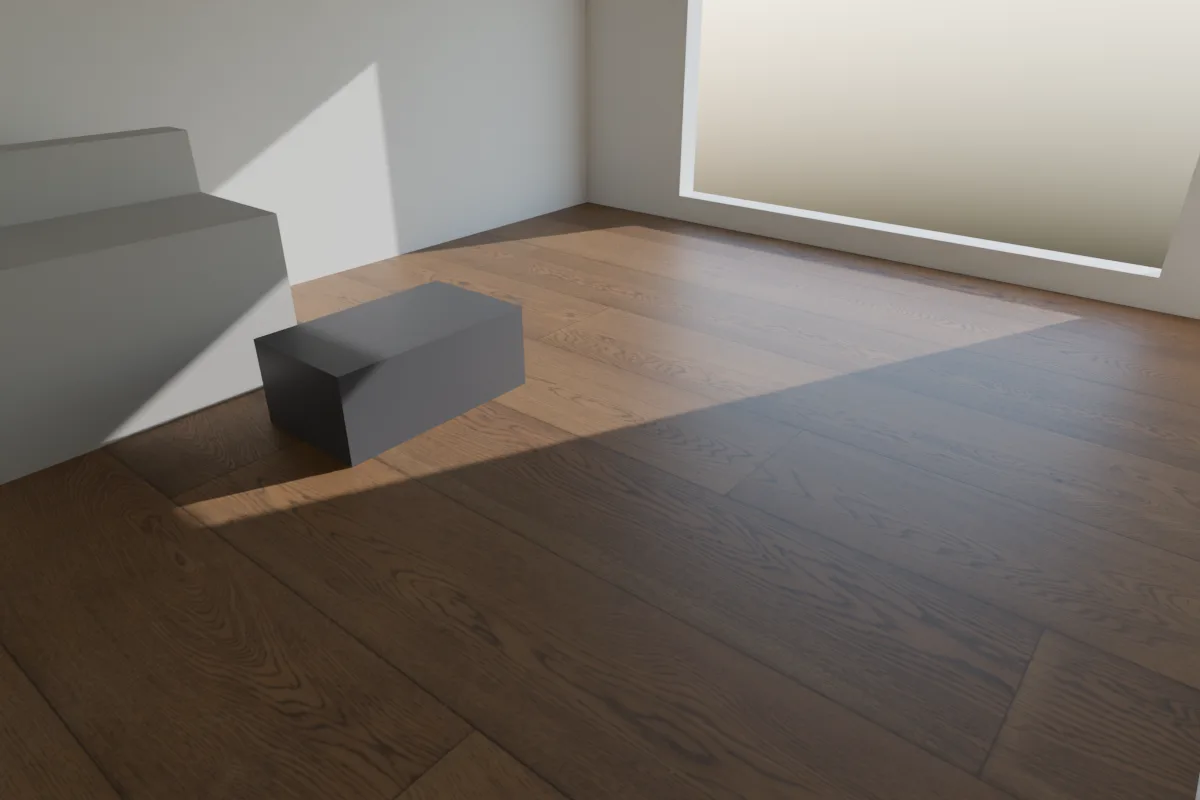
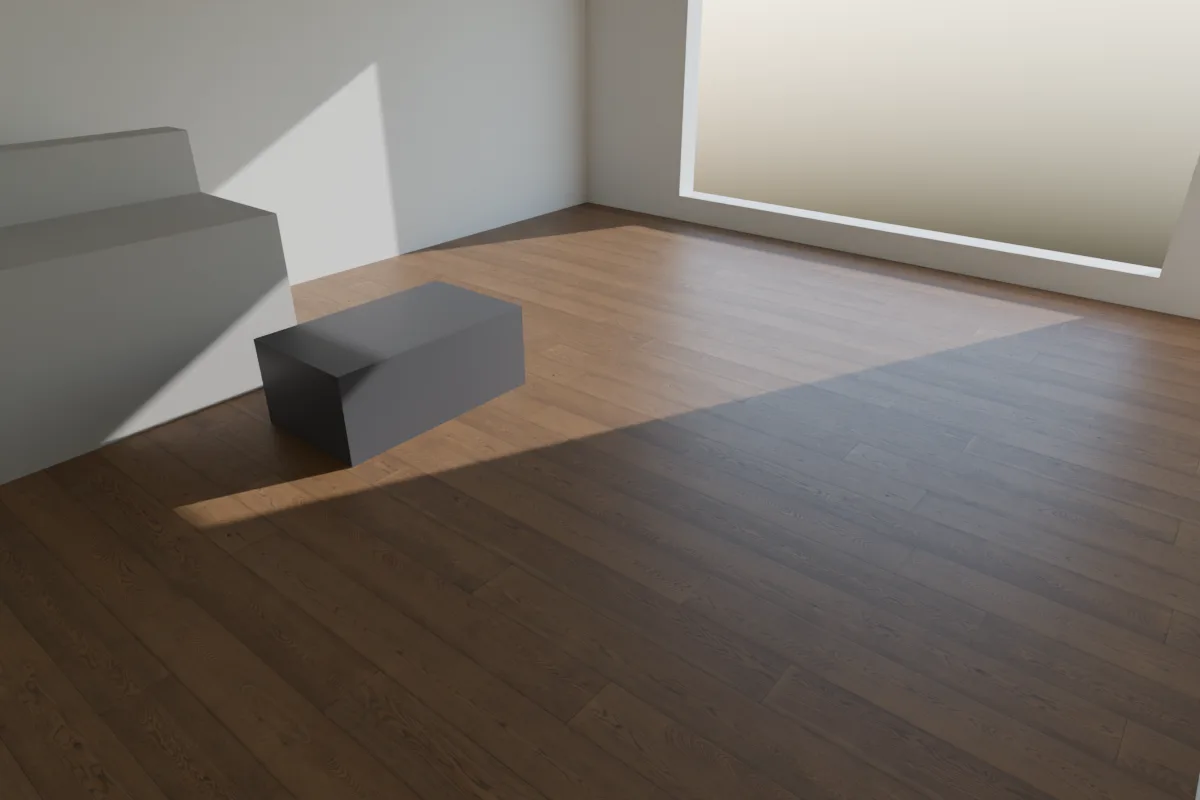
Our own test in Blender 4.5, Cycles. Both use Poly Haven's free Wood Floor texture (CC0, 1.7 m square). Left: only the colour map, on the plane's default UVs, so the 1.7 m texture is stretched over the 6 m floor and each plank comes out about 3.5 times too wide. Right: colour, roughness and normal maps, sized with Object coordinates and a Mapping node.
1. Get a texture set
- Poly Haven and ambientCG have free wood floors and boards under CC0. You need three maps: colour (often called diff or albedo), roughness and normal.
- If the normal map comes in two versions, take the OpenGL one (Poly Haven names it nor_gl). Blender expects that convention, and a DirectX map makes the grooves look lit from the wrong side.
- Write down the texture's real-world size from its page. Poly Haven lists it on each texture. You need it in step 3.
- 2K is enough for a floor seen from standing height. Go higher only for close-ups.
2. Connect the maps
- Select the floor, open the Shading workspace and click New in the Shader Editor header. You get a material with a Principled BSDF.
- Enable Node Wrangler: it ships with Blender but is off by default. In Edit > Preferences > Add-ons, search for it and tick its checkbox.
- In the Shader Editor, select the material's Principled BSDF and press Ctrl Shift T. Select all the maps at once.
- Node Wrangler reads the file names and connects colour to Base Color, roughness to Roughness, and the normal map through a Normal Map node. It sets the data maps to Non-Color and adds a Mapping node in front.
Doing it by hand: one Image Texture node per map. Set the roughness and normal images to Non-Color in the node's colour space menu. Left on sRGB, roughness comes out wrong and the normal map bends the shading.
3. Set the real plank size
This is the step the left image skipped.
- Select the floor and apply its scale with Ctrl A > Scale. Otherwise the texture stretches with the object.
- Find the Texture Coordinate node in front of the Mapping node (Node Wrangler adds one wired from UV; add one yourself otherwise) and connect its Object output to the Mapping node's Vector instead. Object coordinates are in metres, so they don't depend on UVs.
- Set the Mapping node's Scale to 1 divided by the texture's size, on all three axes. For a 1.7 m texture that's 0.588.
- To turn the planks, set the Mapping Rotation Z to 90°.
Object coordinates project from the top, which is fine for floors. For wood on walls, doors and cabinets, set each Image Texture node's projection from Flat to Box and its Blend to about 0.2, so every side gets the texture without streaks. If you'd rather use UVs, unwrap the object (U > Smart UV Project or Cube Projection) and set the Mapping scale from the UV size, which takes more checking.
4. Finish and repetition
- A roughness map already gives a satin finish. For a lacquered floor, raise the Principled BSDF's Coat Weight for a clear layer on top.
- If the normal map looks too strong, lower the Strength on the Normal Map node (default 1).
- In a large room the same knots repeat. A bigger texture (4K covering more floor), a different texture per room, or a different rotation per room all help.
- Blender has no wood texture node. Procedural wood is built from Wave and Noise textures and takes longer to get right than a scanned set. For a floor, we'd use the images.
The node setup is the same in EEVEE. We only rendered it in Cycles.
Or render it in one click
If the room only needs to read as wood for a concept image, Partilock, the Blender add-on we build (macOS), sends the camera view to an AI image model and returns the image in about a minute. A real 2K render, unretouched:
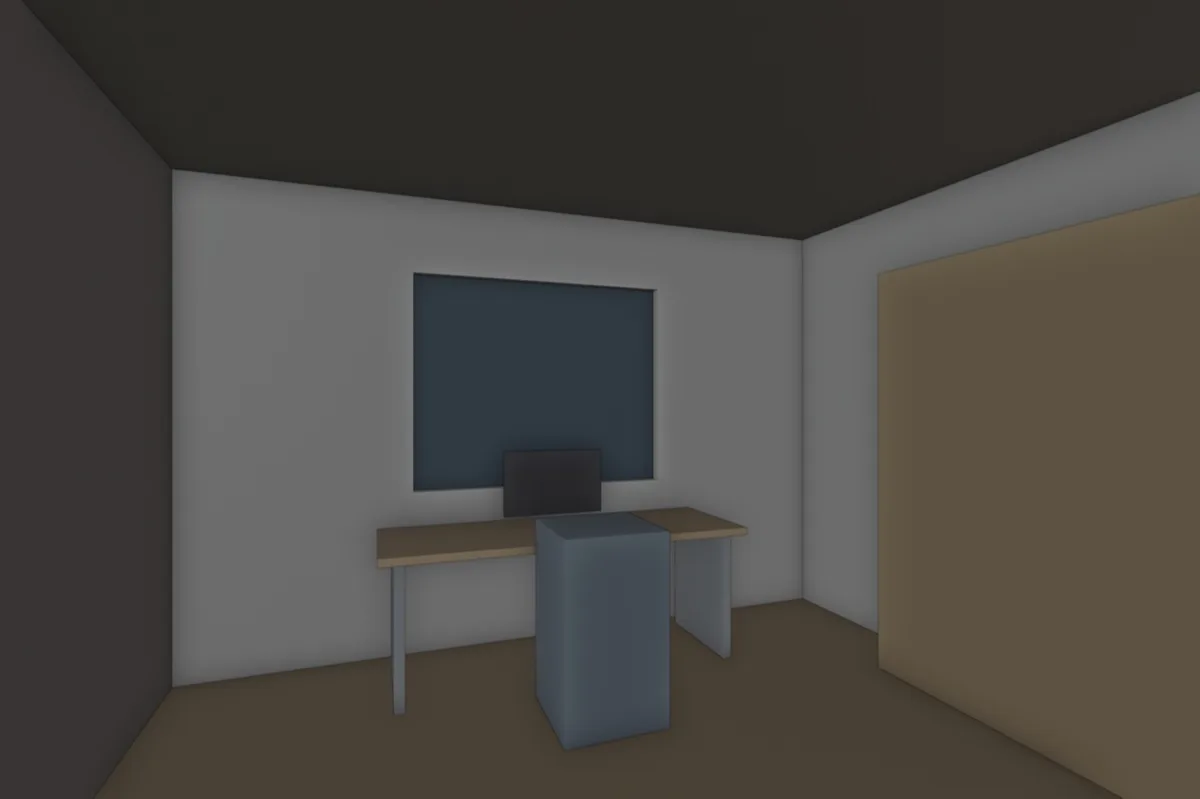
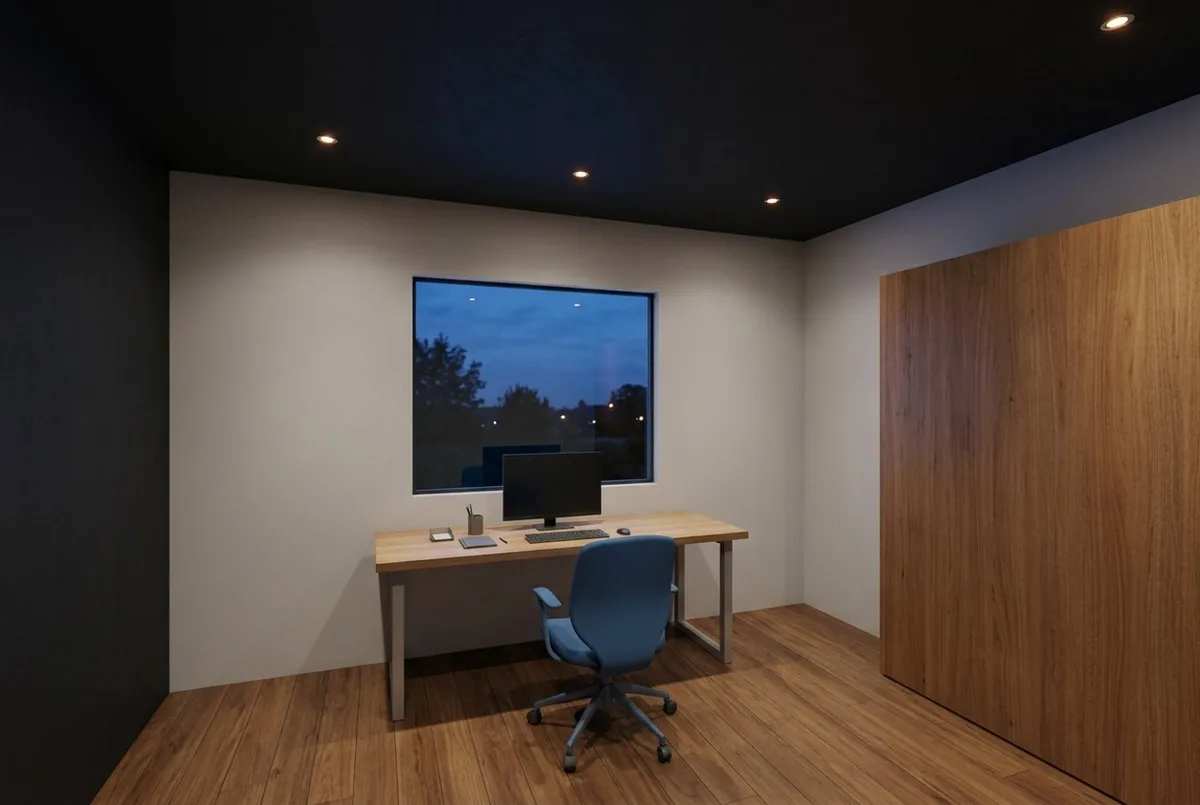
The model had a flat brown floor, a tan panel on the right and a blue box for a chair. The render made the floor wood planks, the panel wood veneer, the box an office chair, and added a monitor stand, keyboard, downlights and a garden outside the window. None of that is in the model.
It's an image, not geometry, and it can add details that aren't in the model, so check it before a client sees it. 2 free renders to try (1K, watermarked), then 2K from $9 for 18. Install guide, pricing.
Next up, concrete in Blender, interior lighting, or less noise in Cycles.