Faster Blender renders: preview settings for archviz
Most renders of a design never reach a client. They're checks: is the light right, does the camera work, is the material too dark. Those don't need final quality, and Blender has built-in presets that get you there in a fraction of the time. Here's what each setting buys, with a timed test.
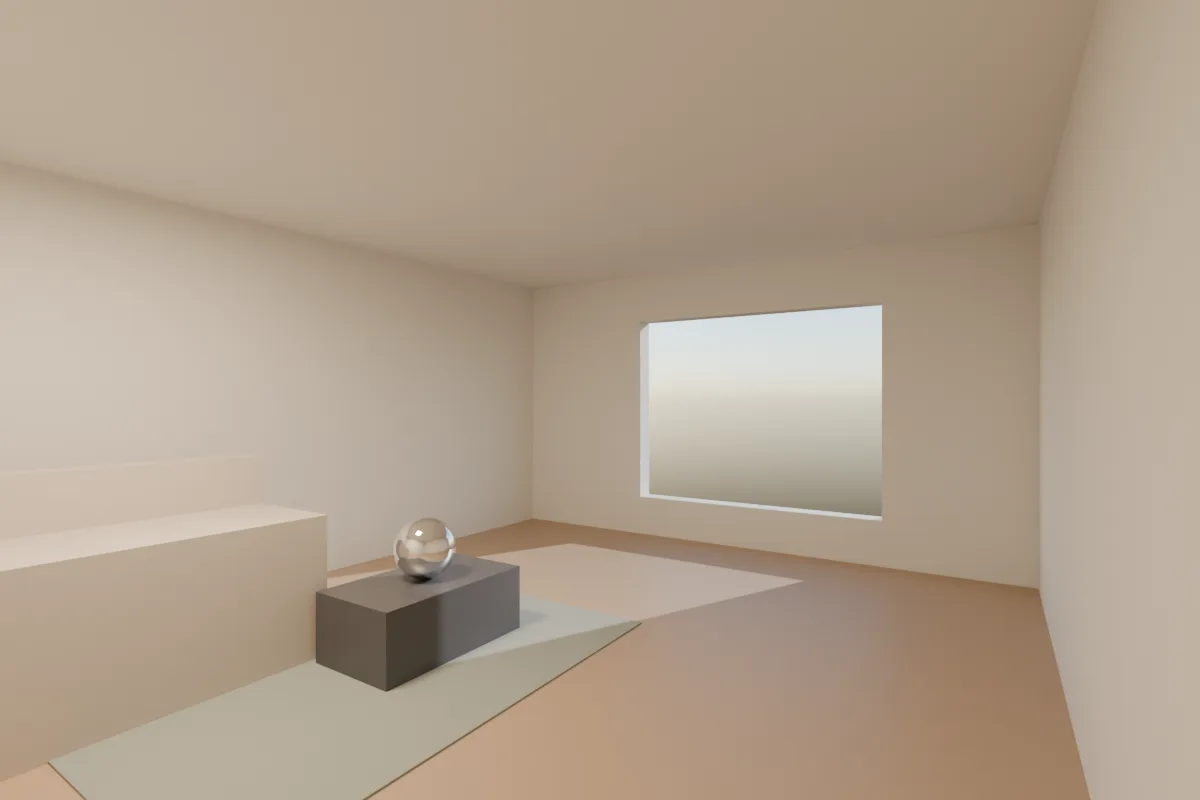
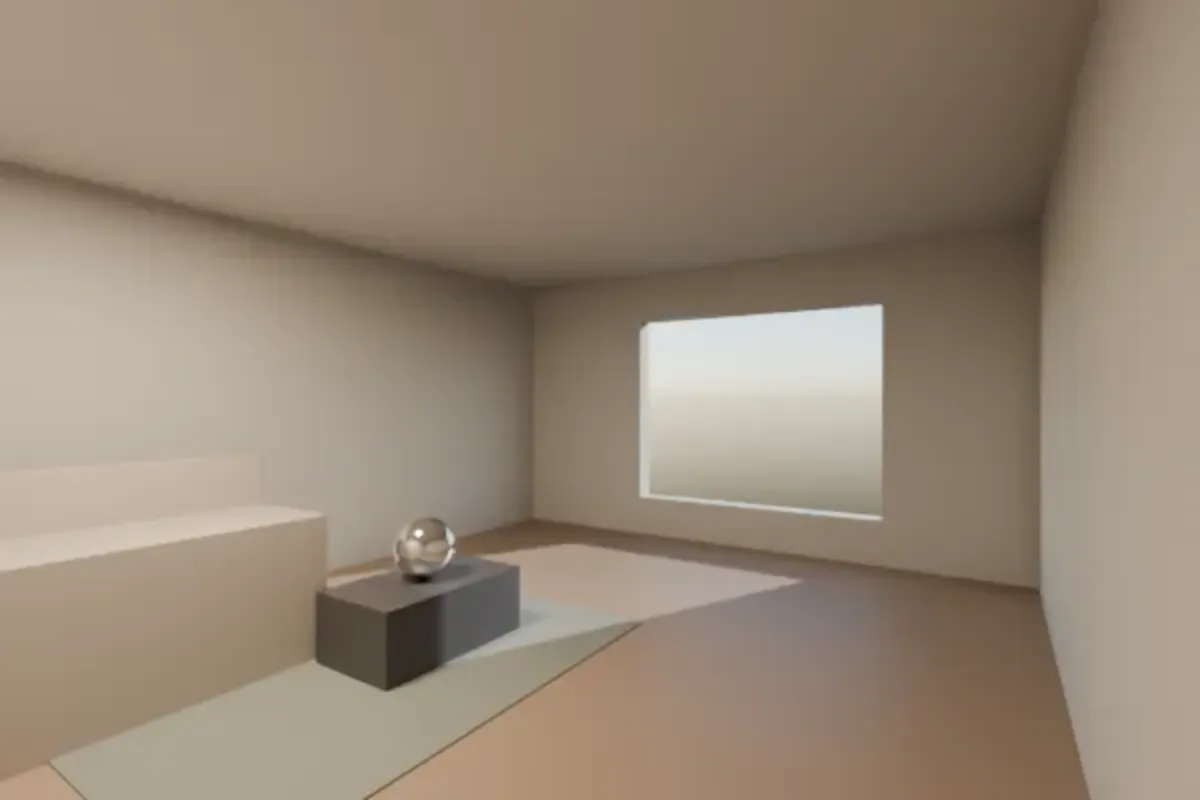
Our own test room in Blender 4.5, Cycles on the CPU of a 4-core 2020 laptop, 1200 × 800, denoised. The right image was rendered at 600 × 400 and is shown enlarged, so it's also softer. The Final preset is a ceiling, not the minimum for a clean image: the same room at a fixed 32 samples with denoising took 60 s in the noise guide. Times are as reported by Blender, on a machine that was running other jobs too, so read them as a ratio rather than a benchmark.
1. Use the sampling presets
The small list icon in the header of Render Properties > Sampling > Render holds two presets for the final render:
| Max Samples | Noise Threshold | |
|---|---|---|
| Preview | 1024 | 0.1 |
| Final | 4096 | 0.01 |
Both turn on the OpenImageDenoise denoiser. The threshold does most of the work. At 0.1, Cycles stops on a pixel as soon as it's roughly clean, and the denoiser cleans the rest. That's fine for checking light and composition. Switch back to Final before anything goes out.
2. Render at 50%
Output Properties > Format > Resolution %. 50% renders a quarter of the pixels, so it takes roughly a quarter of the time, and the aspect and framing stay the same. It's the cheapest speed-up there is.
3. Fewer bounces for drafts
The Light Paths panel has its own preset icon in its header. Fast Global Illumination sets Diffuse bounces to 1, turns caustics off and turns on Fast GI Approximation, which fills in the missing bounce light with tinted ambient occlusion. Rooms come out flatter and darker, as in the right image, but the layout of light and shade is the same. For finals go back to Default (12 total, 4 diffuse, 4 glossy).
4. Render on the GPU
In Edit > Preferences > System > Cycles Render Devices, pick your GPU backend (CUDA or OptiX for NVIDIA, HIP for AMD, oneAPI for Intel Arc, Metal on Macs), tick the device, then set Render Properties > Device to GPU Compute. On a recent graphics card this is often many times faster than the CPU. Our test above is CPU-only, so treat its times as the slow end.
5. Smaller wins
- Time Limit (Sampling > Render): stops the render after a set time, whatever the samples. Good for a batch of quick camera tests.
- Persistent Data (Performance > Final Render): keeps the scene loaded between renders, so the second and later renders of an unchanged scene start sooner. It costs memory.
- Simplify (Render Properties): Max Subdivision and Texture Limit under Render cap heavy subdivision and large textures for a draft without changing the model.
- Viewport render (View > Viewport Render Image) saves exactly what the viewport shows, in seconds. Fine for a layout check with a client.
- EEVEE renders a still in seconds on a decent GPU. For drafts of exteriors it's often good enough, and the light setup carries over to Cycles.
6. Before the final render
Switch the sampling preset back to Final, Resolution % to 100 and Light Paths to Default. A draft setting left on is the most common reason a final looks flat.
Or render it in one click
If the draft is for a client conversation, not a final, Partilock, the Blender add-on we build (macOS), sends the camera view to an AI image model and returns the image in about a minute. A real 2K render, unretouched:
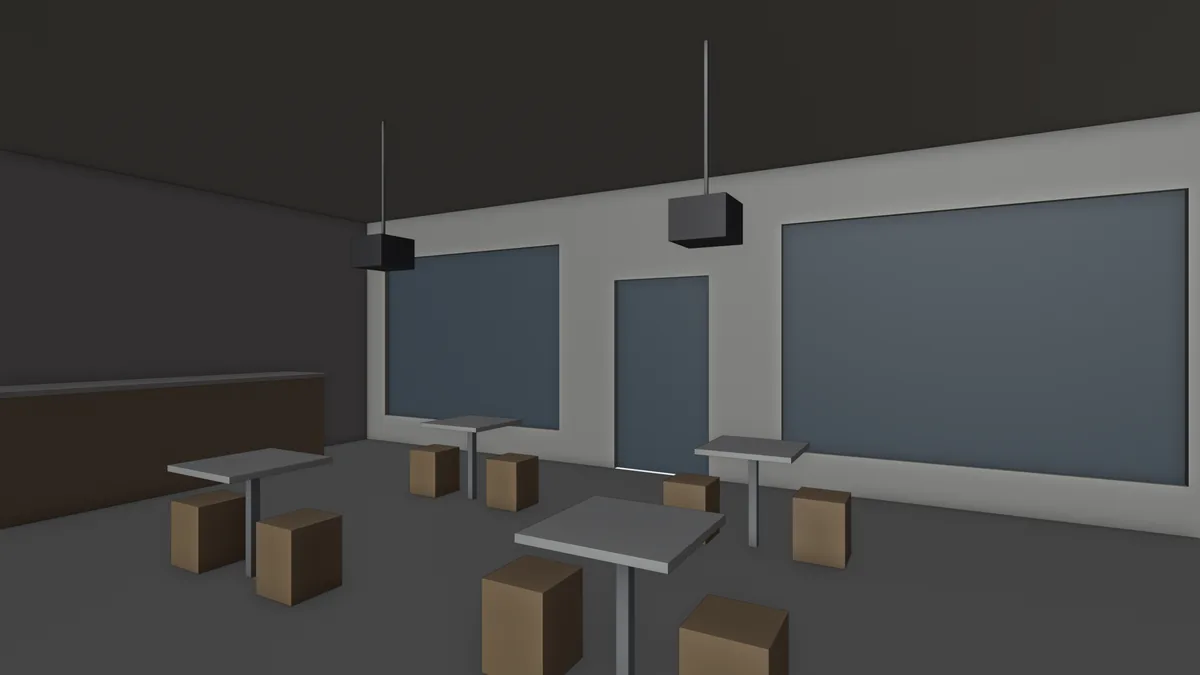
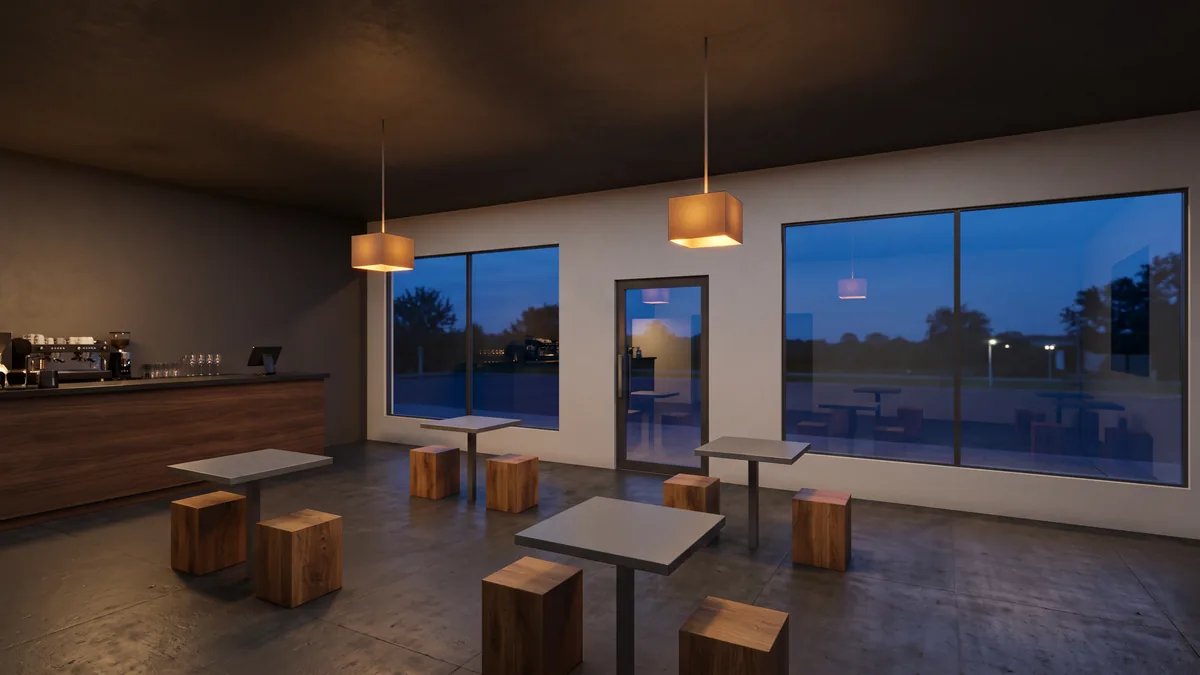
The model had tables, stools, a counter, a door and pendant boxes. The render added an espresso machine and the outside view, and split the big windows with mullions. Small additions like these are why we say check it first.
It's an image, not geometry, and it can add small fittings, so check it before a client sees it. 2 free renders to try (1K, watermarked), then 2K from $9 for 18. Install guide, pricing.
Next up, noise and fireflies, clay renders, or from the viewport to a concept render.